
Updated December 2025
Summary:
To send a fax from your printer, you must first confirm that it’s fax-capable by checking for a dedicated fax button or phone jack on the back of the machine, or, alternatively, installing the required fax kit. Once you’ve connected your printer to a landline, configure your fax number and preferred settings, add your fax header, and send a test fax to ensure everything is working as it should. If you don’t have a landline or need a faster alternative, try FaxBurner to send and receive faxes online without any of the hassle.
How Do I Send a Fax From My Printer?
| Time to Read | 8-10 minutes |
| What You’ll Learn |
|
| Next Steps |
|
So you’ve brought home a printer that has faxing capabilities, and now you’re staring at that little Fax button, wondering why it even exists. Do people still use fax machines?
Surprisingly, yes!
And here’s why that matters for you.
There are moments in life (important, time-sensitive moments) when a doctor’s office, insurance company, lender, or government agency will only accept a fax. It’s a bit retro, sure, but it’s still one of the most secure, universally accepted ways to send official documents.
The good news? You don’t have to be a tech expert to use it. Once you know how it works, faxing becomes one of the simplest ways to get critical paperwork where it needs to go.
And if your printer truly doesn’t support faxing (or you just don’t want to bother with phone lines or extra hardware), there’s an easier way. FaxBurner lets you send and receive faxes right from your phone or computer, no special equipment required.
Is Your Printer Fax-Capable?
Before you dive right in, let’s make sure your printer actually has faxing capabilities first. The easiest way to tell is by looking for a Fax button on the control panel or a phone jack on the back of the machine. Some models even give it away in the name: if you see “MFC” (short for Multi-Function Center), that usually means it can send faxes.
If you don’t spot any of those features, don’t panic just yet. Some printers come with an add-on fax kit, or one may be purchased separately. Be sure to consult your printer’s user manual to determine if this is a viable option.
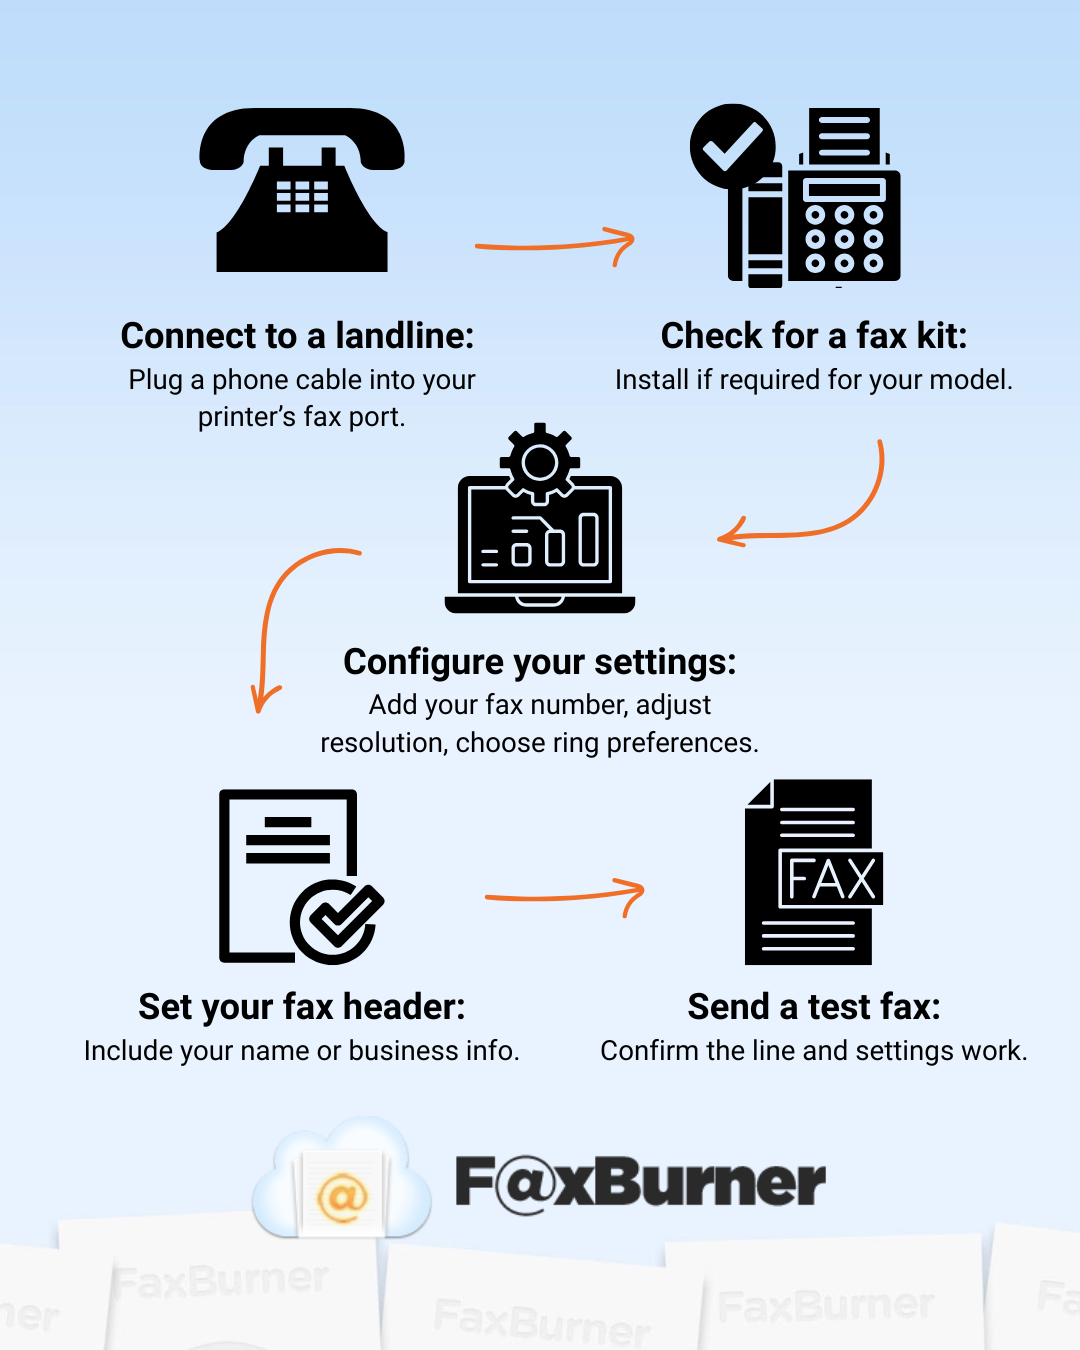
How to Set Up Faxing on Your Printer
Step One: Connect your printer to a telephone landline
Look for the small phone jack on the back of your printer and plug in a standard phone line. If you don’t have one, you won’t be able to send or receive faxes.
Step Two: Check whether you need a fax kit
As mentioned earlier, some printers are fax-capable right out of the box, while others may need a fax kit to activate the feature. Check your user manual or manufacturer’s website for more info.
Step Three: Walk through your fax settings
At this step, you’ll enter your fax number and adjust settings like the number of rings before the machine answers, resolution, and contrast.
Step Four: Add your fax header
Your fax header is the line that appears at the top of every fax you send. It usually includes your name, your business name (if applicable), and your fax number. It identifies you as the fax sender.
Step Five: Send a quick test fax
Don’t just rely on your setup; run a test to be sure everything has been done correctly. This will confirm that your line works, the settings are right, and that everything is communicating properly.
General Methods of Faxing (Beyond Brands)
No matter which printer you’ve bought, most fax-capable printers rely on the same core methods to get your documents where they need to go. You’ll send your faxes in one of two ways: the feeder method or the print driver method.
The feeder method is the image your brain conjures up when you think of a fax machine. You place the pages into the automatic document feeder (ADF) or lay them on the scanner glass, dial the number, and press send. Your printer takes it from there. It’s simple, dependable, and perfect for all of your physical documents that need faxing.
The print-driver method, also known as PC-Fax, is for when the file you’re looking to fax lives directly on your computer. Instead of printing the document and feeding it into the machine, you can fax it straight from your desktop. All you have to do is open the document, press Print, and choose your printer’s fax option from the list. From there, you enter the recipient’s fax number, hit send, and your printer will transmit the fax without needing a physical copy.
How to Fax From a Specific Printer Brand
| HP Printers | Canon Printers | Brother Printers | Epson Printers |
|---|---|---|---|
|
|
|
|
Can You Fax Without a Landline?
If you’re holding out hope that you can skip the whole landline situation (we know how rare an actual landline is these days), here’s the unfortunate truth: traditional fax hardware still needs a phone line to work. Without it, your printer simply can’t send or receive faxed documents.
But there is good news! You’re not stuck.
If you don’t have a landline, FaxBurner’s online fax service gives you your own fax number and lets you send and receive documents right from your phone, tablet, computer, or email account.
Troubleshooting Common Fax Issues
Even when everything is set up properly, faxing can occasionally run into hiccups. Thankfully, most of the issues you may encounter are easy to troubleshoot once you know what to look for.
No Dialtone or “Line Not Connected Errors
If your printer isn’t detecting a dial tone or keeps telling you the line isn’t connected, check that the phone cord is plugged all the way into both the wall jack and the printer, and double-check that the line itself is active.
Poor Transmission Quality
If outgoing faxes are going through, but the quality is poor (streaky, fuzzy, or faint), your scanner glass may need to be cleaned. Dirt, fingerprints, and dust can make a big difference in fax clarity. You can also try adjusting the resolution or contrast settings, or even check your ink or toner levels to make sure the printer has enough to produce a clear image.
Fax Won’t Send
When a fax refuses to send altogether, it’s often something small, like a mistyped fax number or a busy signal on the recipient’s end. Confirm the number, check for the correct country/area code, and try again after a few minutes.
Incoming Faxes Aren’t Printing
If the problem is on the receiving end, like incoming faxes not printing, your settings are the most likely culprit. Make sure auto-answer is on, confirm there’s paper in the tray, and double-check the settings to ensure the machine prints faxes as they arrive, rather than storing them in memory.
Best Practices & Tips for Efficient Faxing From Your Printer
Even once you’ve mastered the basics of faxing from your home printer, a few simple habits can make everything run a little smoother, faster, and way more reliable. Here are some best practices from the team at FaxBurner to help you get the cleanest results with the least frustration:
- Choosing the right resolution: Use a lower resolution for simple text documents to speed things up, and a higher resolution for detailed forms or anything with fine print.
- Turn on confirmation reports: They let you know that your fax was successfully transmitted, which can be especially important for legal, medical, or time-sensitive documents.
- Enable Error Correction Mode (ECM): Error Correction Mode helps ensure that your important faxes reach their intended recipients clear, complete, and uncorrupted.
- Use your fax logs: If your printer supports them, they make it easy to organize, track, and reference everything you’ve sent and received.
- Try broadcast faxing for repeated sends: If your printer allows it, broadcast faxing saves time by letting you fax the same document to multiple recipients at once.
- Send during off-peak hours: This can be especially useful if your phone provider has a rate difference, or if you just want to avoid busy signals.
Having to go out of your way to a Staples or a library to send a single fax can be a major pain. Thankfully, technology always finds a way to meet our needs, which is why so many people choose printers with built-in fax machines. And using a home fax machine is a lot less complicated than it sounds. Once you understand the basics and walk through a few simple steps, your printer handles everything else.
At Faxburner, we’re here to walk you through setting up and sending a fax with your new printer, no matter the brand. And if all else fails, just remember that we’re pretty good at sending faxes ourselves. It’s in the name, after all. Contact us to learn more about FaxBurner or to get your free fax number today.
FAQs
Are all printers with scanners automatically able to send faxes?
No. A scanner doesn’t guarantee fax capability. Your printer needs a fax modem, a phone line port (RJ-11 jack), or an optional fax kit, depending on the brand.
What’s the difference between HP, Canon, Brother, and Epson printers when scanning?
Most brands follow the same basic steps, but their controls and settings can vary slightly. Always check the user manual for your specific printer.
Why does my printer need a phone line to fax?
Traditional fax hardware uses analog phone signals. Without a landline, the fax modem inside your printer has nothing to connect to, so it won’t be able to send or receive faxes.
Can I fax over Wi-Fi instead of using a phone line?
Not with a printer’s built-in fax. Wi-Fi is only used for printing and scanning. Even using a feature like PC-Fax requires a phone line. If you want to fax without a landline, you’ll need FaxBurner’s online faxing service.
Is online faxing more reliable than hardware faxing?
Often, yes. Hardware faxing depends on the phone line quality, while online faxing services rely only on internet access and avoid busy signals and analog line errors.
Should I still buy a fax-capable printer if I only fax occasionally?
Probably not. If you only fax a couple of times a year, FaxBurner’s online faxing service is usually cheaper, simpler, and much more convenient than setting up a landline or maintaining a printer’s hardware.